Imagine you’re at a critical meeting or brainstorming session, and a wonderful thought occurs to you—you need to write it down before it goes.
Perhaps you’re organizing your day and want to make a fast list of things as they come to mind. This is when Quick Notes iPhone’s strong function comes into action.
It allows you to quickly and easily collect thoughts and information, ensuring that you never miss those moments of inspiration again.
This Okayreview guide will show you how to create and use Quick Notes iPhone efficiently. Let’s dive in and start taking notes right away!
Table of Contents
What Are Quick Notes iPhone?
Quick Notes is an iOS-specific feature that allows you to take notes quickly and conveniently. It can smoothly interact with almost any scenario, whether you’re surfing, reading, or trying out new apps.
This integration allows you to collect a variety of information snippets from many sources, all of which are easily available with a few touches on your screen.
How to Enable Quick Notes on Your iPhone?
Before you can start utilizing Quick Notes iPhone, make sure your iPhone runs on iOS 14 or later, as this feature is not available in earlier versions. To enable Quick Notes, follow these steps:
Step 1: Verify Your iOS Version
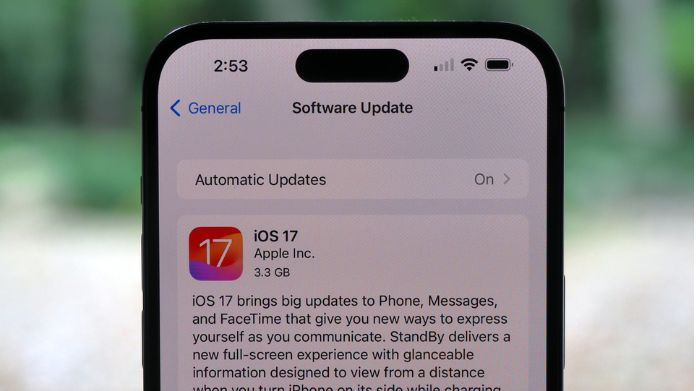
 First and foremost, check that your iPhone is running iOS 14 or later. Quick Notes is a feature introduced in iOS 14; hence, it will not be available in previous versions.
Check your iOS version:
- Open the Settings app.
- Tap on General.
- Select About.
- Look for the Software Version.
If you are not up to date, return to General, hit Software Update, and download the most recent iOS version available for your device.
Step 2: Add Quick Notes to the Control Center
 To make accessing Quick Notes as easy as pie, you’ll want to add it to your Control Center:
- Navigate back to the Settings app.
- Scroll and tap on Control Center.
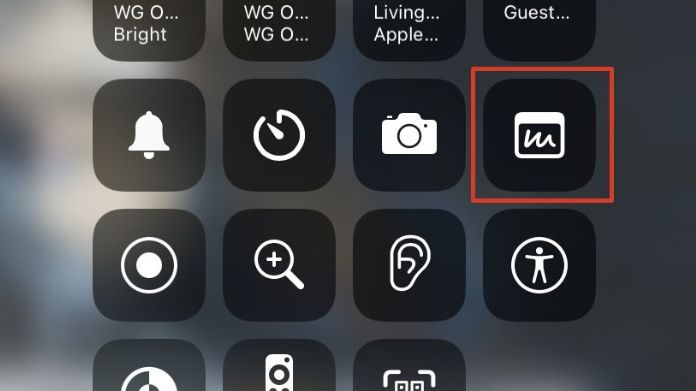
- Find Quick Notes under the More Controls section and tap the green plus icon next to it.
This action slots Quick Notes into your Control Center, making it accessible with just a swipe and a tap—no need to unlock your phone and find the app.
Step 3: Customize Accessibility Shortcuts (Optional)
Customizing your phone’s gestures to launch Quick Notes may be a game changer for individuals who truly want to optimize their experience—or if you find yourself a regular note-taker.
- If you are still in the Settings app, go to Accessibility.
- Tap Touch.
- Scroll to Back Tap.
- Choose Double Tap or Triple Tap and select Quick Notes.
This setup lets you launch Quick Notes by simply tapping the back of your iPhone. I set mine to a double tap, and now I can open a new note while walking without skipping a beat.
It feels like magic!
Step 4: Test It Out
 Now that you’ve got everything configured give it a whirl:
- Open your Control Center by swiping down from the top-right corner of your screen (or up from the bottom if you have an older iPhone).
- Tap the Quick Notes icon you just added.
By configuring these settings, you ensure that Quick Notes are just a swipe away, no matter what you’re doing on your iPhone.
How to Create Quick Notes iPhone?
Creating a Quick Note is straightforward:
- Access from Control Center: Swipe down from the top-right corner of your screen to open the Control Center and tap the Quick Notes icon.
- Use Gestures: If enabled, use a two-finger swipe from the bottom-right corner of the lock screen or use the relevant shortcut on an external keyboard.
- Adding Content: After opening the note, you can type text, add links, and include images. The toolbar at the bottom provides formatting options to personalize your entry.
Quick Notes is an amazing application for swiftly gathering many types of data because to its simplicity of adding and changing information.
Practical Tips for Managing Quick Notes iPhone
Managing your Quick Notes effectively can turn a useful tool into an indispensable part of your daily routine.
Here are some practical tips to keep your digital notebook tidy and functional, drawing from my own experiences with Quick Notes.
- Categorize Your Notes: Divide your notes into categories like “Work,” “Personal,” or “Ideas” using tags and folders. This organization helps you quickly locate the information you need.
- Sync Across All Devices: Enable iCloud sync for Notes by navigating to Settings > [your name] > iCloud and turning on Notes. This keeps your notes updated across all Apple devices, ensuring access wherever you go.
- Regular Review and Cleanup: Set a routine to clean up your Quick Notes:
- Archive or Delete: Remove outdated notes.
- Merge: Combine related notes to reduce clutter.
- Use Search and Siri: Leverage the search function and Siri to quickly find notes. Simply type in keywords or ask Siri to locate notes on specific topics.
Efficient management not only helps in keeping your digital space clutter-free but also makes information retrieval a breeze when you need it most.
Wrapping Words
Quick Notes on the iPhone is a versatile and useful tool for increasing productivity and managing information. By incorporating this function into your everyday routine, you can ensure that no ideas or vital information go through the cracks.
Experiment using Quick Notes for personal chores, meetings, and reminders, and consider connecting it with other Apple services such as Reminders and Calendar for a more simplified experience.
Dive in and take full use of Quick Notes’ features!


The matchless message, is pleasant to me 🙂