If you’re tired of that outdated, textured ceiling in your home, you’re not alone. Popcorn ceilings, once popular for their ability to hide flaws, have fallen out of favor in modern home design.
Removing this texture can seem like a daunting task, but with the right tools and techniques, it’s entirely doable.
We’ll teach you how to operate a popcorn ceiling removal tool like an expert in this article, which will make the job go more smoothly, quickly, and neatly than you would think.
We have helpful hints and troubleshooting techniques to help you get a clean, smooth ceiling without the bother, regardless of your level of experience with do-it-yourself projects.
Let’s get started and turn that ceiling into something modern and fashionable!
Table of Contents
Why Should You Consider Removing Your Popcorn Ceiling?
First, let’s address why you might want to remove that popcorn ceiling in the first place. Popcorn ceilings, also known as acoustic ceilings, were once a famous choice for homeowners due to their texture and soundproofing qualities.
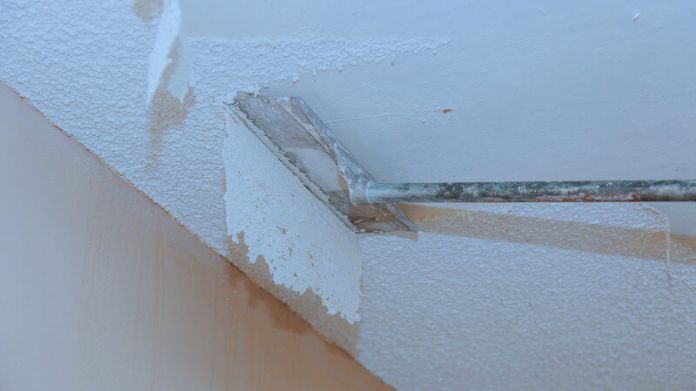 However, they have since fallen out of favor. You know, textured ceilings can really be a pain to keep clean.
They tend to gather dust, cobwebs, and stains, and it’s tough to get rid of all that. And if your ceiling is pretty old, there’s even a chance it might have asbestos in it, which is seriously bad for your health.
Removing popcorn ceilings is more than simply a cosmetic choice; it also improves the overall condition of your house.
Once the popcorn texture has been removed, you will be left with a smooth, clean surface that is simple to paint, maintain, and keep dust-free.
If you’re planning to sell your house, a contemporary ceiling might boost the overall appeal of the area to potential buyers.
But how can you achieve a clean, smooth ceiling without spending a fortune on professional help? The answer lies in the popcorn ceiling removal tool.
What is a Popcorn Ceiling Removal Tool?
You might be wondering what a popcorn ceiling removal tool is and why it’s needed. A popcorn ceiling removal tool is any equipment used to scrape off the rough surface of a popcorn ceiling.
These instruments can take several forms, ranging from basic scraping knives to more complex electric scrapers.
Regardless of the model you pick, they’re all meant to make the task faster, cleaner, and more effective.
Some tools are designed to simply scrape the ceiling, while others include features that help with things like spraying water to soften the texture or catching the debris as it falls.
The right tool for you depends on the size of your room, the condition of your ceiling, and your comfort level with DIY projects.
Don’t worry—we’ll cover all of these considerations later on.
How to Use a Popcorn Ceiling Removal Tool Like a Pro?
Now that we’ve discussed why you should remove your popcorn ceiling and what instruments are available let’s look at how to utilize a popcorn ceiling removal tool properly.
Don’t worry; it’s not as complex as it appears at first sight. By following these basic procedures, you’ll be able to get professional-looking results quickly.
1. Gather Your Tools and Materials
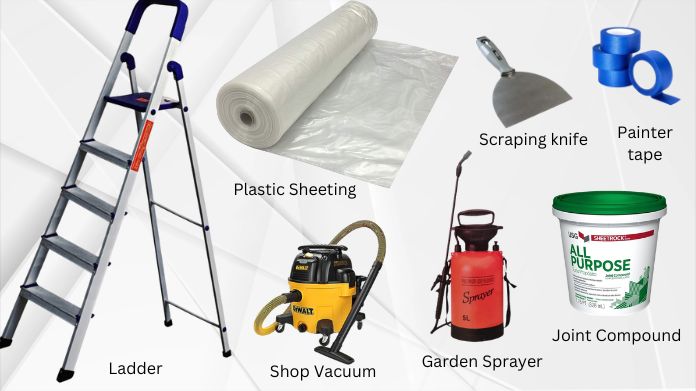 Make sure you have everything in your tool storage you’ll need before you start. A neat workstation could make the process run more smoothly.
Here’s a brief rundown of everything you’ll need:
- Popcorn Ceiling Removal Tool: This could be a scraping knife, an electric scraper, or a specialized tool that sprays water while scraping.
- Drop Cloths or Plastic Sheeting: You’ll want to protect your floors and furniture from falling debris. Lay down drop cloths or plastic sheeting to catch the mess.
- Painter’s Tape: Use painter’s tape to protect the edges of your walls and trim from damage during the process.
- Ladder: A sturdy ladder is essential to reach high ceilings comfortably and safely.
- Water Spray Bottle or Garden Sprayer: Some tools require you to wet the ceiling beforehand to loosen the texture. A spray bottle or a garden sprayer works well for this.
- Dust Mask and Safety Goggles: Safety is key, so wear a dust mask and goggles to protect yourself from dust and debris.
- Shop Vacuum: A shop vacuum will help you clean up quickly as you work.
- Plaster or Joint Compound (if needed): After removal, you may need to patch any imperfections with plaster or joint compound.
2. Prep Your Ceiling
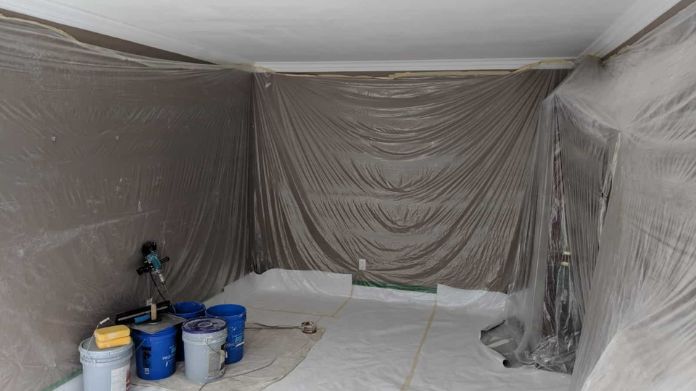 Before you begin scraping, you need to prepare your ceiling. This includes shutting off the electricity in the room to prevent mishaps with light fixtures.
To collect any falling debris, it’s also crucial to cover the floor and furnishings with plastic sheeting or drop cloths. You can also use painter’s tape to cover the edges of the walls and trim to protect them from the removal process.
Now, take a look at your popcorn ceiling. If it’s starting to peel or crack, test a tiny area first to see if the material peels off without any problems.
Better safe than sorry, right? If your ceiling is particularly old, you may need to test for asbestos. If asbestos is present, it’s best to hire a professional for removal.
3. Soften the Texture
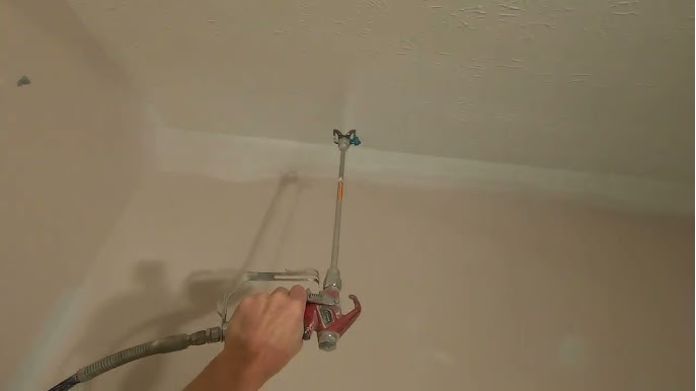 The key to successful popcorn ceiling removal is to soften the texture. Popcorn ceilings are made of a material that can be tough to remove if it’s dry and hard.
To make the process easier, you’ll need to spray the ceiling with water. This helps loosen the texture and makes it easier to scrape away.
Use a spray bottle or garden sprayer to lightly mist the ceiling with water. Allow the water to sit for 10-15 minutes to soften the popcorn texture. Don’t oversaturate the ceiling, as excess moisture could damage the drywall underneath.
4. Scrape Away the Texture
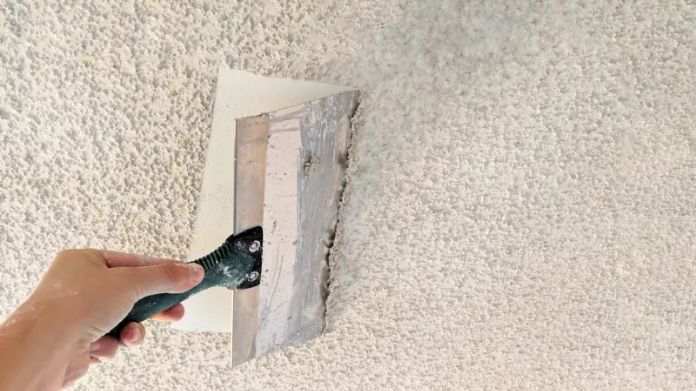 Once the ceiling is softened, it’s time to start scraping. Take your popcorn ceiling removal tool (whether it’s a scraper or an electric tool) and begin at one corner of the room.
Work in small sections, using long, smooth strokes to scrape off the texture. Be gentle—rushing the process can damage the ceiling beneath.
If you’re using a manual scraper, you’ll need to apply consistent pressure as you scrape away the popcorn texture.
With an electric scraper, the tool will do much of the work for you, but you’ll still need to be careful not to damage the ceiling underneath.
5. Clean Up and Patch Up
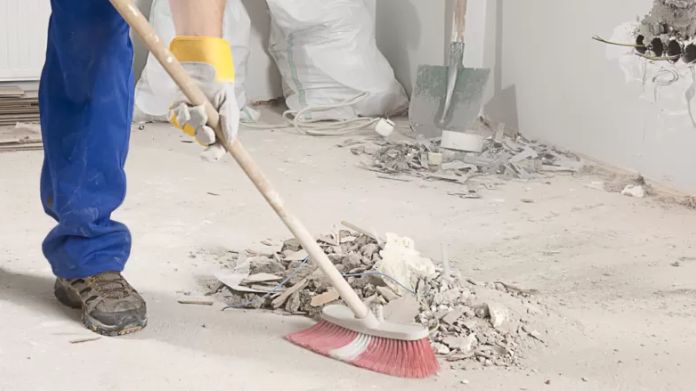 After you’ve removed the texture, it’s time to clean up. Use a shop vacuum to clean up any remaining debris on the floor and walls.
You may also need to patch up any imperfections in the ceiling with a joint compound or plaster. Once the ceiling is completely dry, sand it down to smooth out any rough spots, and then you can apply your chosen paint or finish.
Helpful Tips for Using a Ceiling Texture Scraper
Here are some tips and troubleshooting advice to help you use your ceiling texture scraper effectively.
- Start Small: Test a small section of the ceiling first to check how easily the texture comes off. This will also help you determine if you need to soften it with water.
- Use the Right Scraper: Choose a scraper with a sharp edge. A long-handled scraper is ideal for high ceilings, while a wider blade (6-8 inches) helps cover more surface area.
- Soften the Texture: Mist the ceiling with water to soften the texture before scraping. Let it sit for 10-15 minutes. If it’s still tough, spray again and wait a bit longer.
- Apply Gentle Pressure: Scrape with light, steady pressure to avoid damaging the ceiling beneath. Start at one corner and work in small sections.
- Work in Small Sections: Breaking the job into small sections will make it easier to manage and ensure you don’t overwet the ceiling.
- Clean as You Go: Use a shop vacuum to clean up debris as you scrape so the mess doesn’t pile up.
- Patch and Sand: After removal, patch any holes with the joint compound, then sand the ceiling to smooth it out.
Final Thoughts
Removing a popcorn ceiling doesn’t have to be a scary task. With the right popcorn ceiling removal tool and a little patience, you can easily tackle this DIY project and give your home a fresh, modern look.
Just take it slow, make sure the area is all set up right, and grab the right tools for the job. Trust me, with a little effort, you’ll get rid of that old texture and end up with a nice, smooth ceiling that’ll make your room look great for years!

Thank you for the informative article on popcorn ceiling removal tools. The inclusion of both manual tools, like the Homax Ceiling Texture Scraper, and electric options, such as drywall sanders with vacuum attachments, offers readers a comprehensive understanding of their choices.